
What Acoustic Treatment Do I NEED for a Home Studio?

This is the one question we get from just about everyone we talk to – and for good reason. Acoustics and the physics behind it can be an intimidating subject. The aim of this article is to simplify the topic of home studio acoustics, break it down into easy-to-implement strategies, and provide you with the knowledge to create the best possible acoustic environment for your studio. Let’s jump right in.
The core principles of home studio acoustics:
No matter the size, use, or layout of your space, if you follow these four principles you will be on your way to a great sounding home studio.
Order of operations. Treat areas of your room in this order: early reflections (ceiling and sidewalls), rear wall, front wall, corners, late reflections, soffit corners.
Bigger truly IS better. Or, more accurately, deeper is better. Depth is the only way to make acoustic panels work at low frequencies. There is nowhere in your room that will be better suited to a 2” deep acoustic panel than a 4”, 6”, or even 8” deep panel.
Air gaps are an acoustic panel’s best friend. Utilizing air gaps between acoustic panels and the boundary they are installed on will significantly increase their performance.
Expectations and budget. Home studios are imperfect, but that doesn’t mean you can’t make a Grammy-winning record in yours. Remember, not treating everything at once is OK. Follow the order of operations and utilize your budget to get the deepest panels you can while still covering your early reflections. Then, continue on from there as your budget allows, adding additional acoustic panels and bass traps over time.
Four questions to consider:
The four principles above will apply to every room; however, every engineer/artist/producer and their studio will be unique.
The four questions below inform the rest of the studio treatment process, tailoring it to you. If you can answer these four questions about your room, after finishing this article, you will be able to determine what acoustic treatments are right for your home studio.
Space. What are the dimensions and layout of your room? What are the physical limitations such as doors or windows? How much space are you willing to give up for acoustic treatments?
Use. What do you use the room for (e.g., mixing, recording, producing, writing, etc.)? For the rest of this article, we’ll assume the user is mixing.
Goal. What are your goals for the acoustics of your studio (e.g., creating a great sounding space to record, even decay times, better translation from the studio to the car, controlling room modes, etc.)?
Budget. How much would you like to invest in acoustic treatments for you and your studio?
Everything is better with examples, so let’s put the four principles and questions to use.
Below are examples of small, medium, and large home studios treated with budgets ranging from $500 all the way up to $10,000. For all of the examples in this article we’ll assume the use of the room is mixing.
*All of the budgets include the products shown and shipping costs in the U.S.
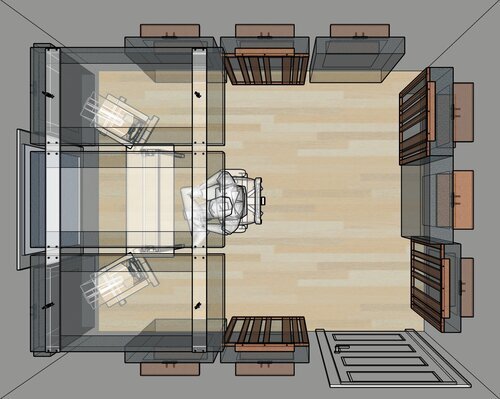
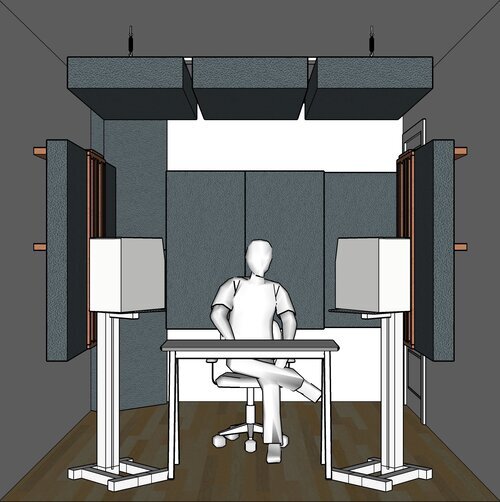
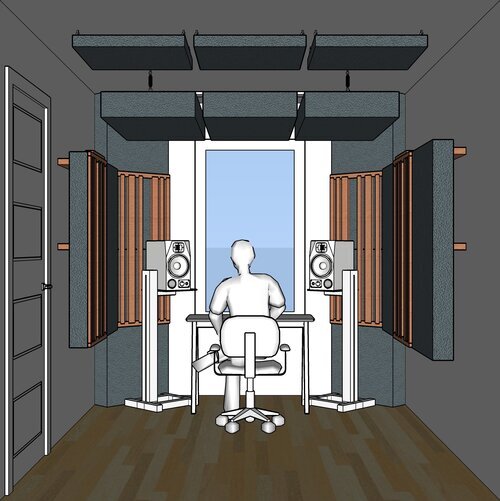
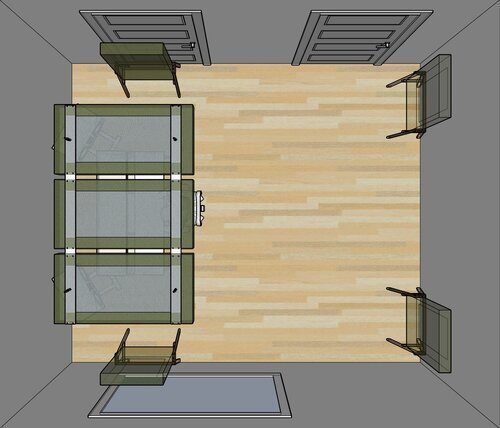
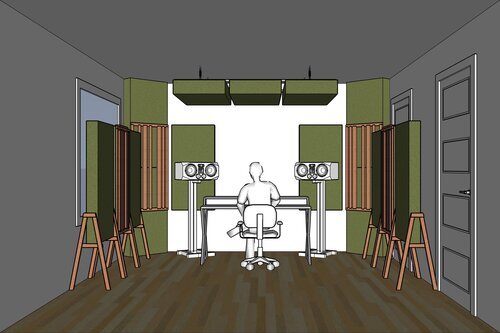
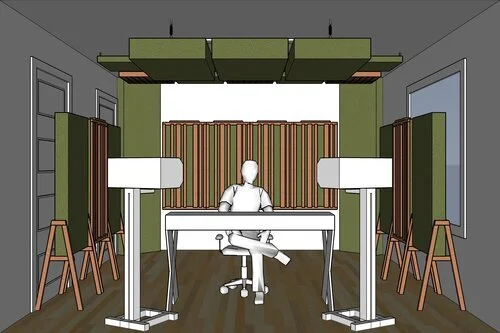
Treatment for a small home studio (8’x10’x8’)
Budget: $500
Select each drop down to see the details of this acoustic treatment setup.
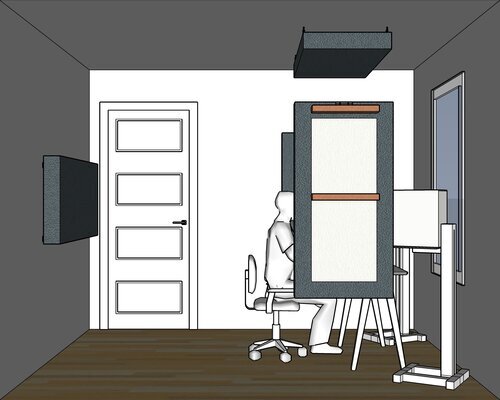


〉Acoustic treatments
〉What this treats
〉What this doesn't treat
Budget: $1,000
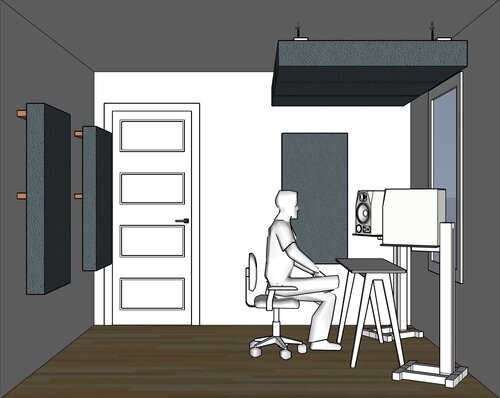
〉Acoustic treatments
〉What this treats
〉What this doesn't treat
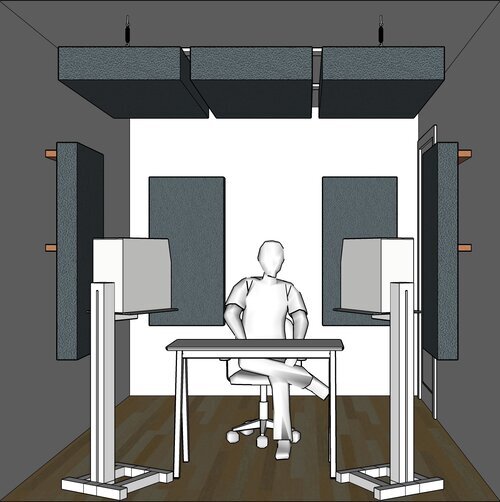
Budget: $2,000


〉Acoustic treatments
〉What this treats
〉What this doesn't treat
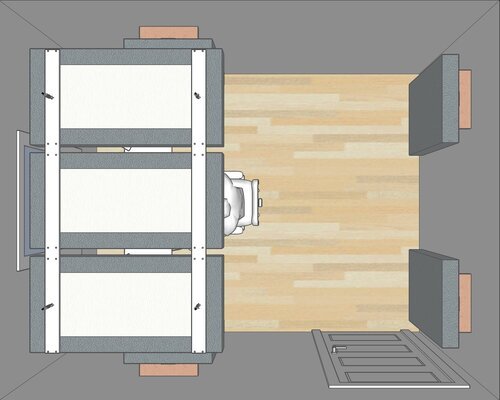
Budget: $3,000


〉Acoustic treatments
〉What this treats
〉What this doesn't treat
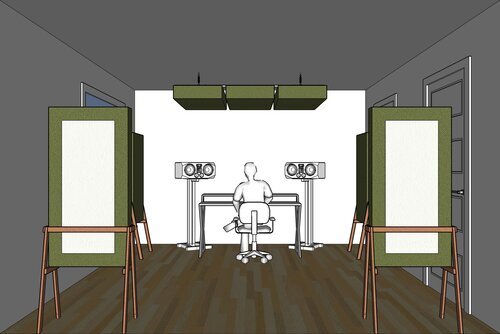
Treatment for a medium-sized home studio (12’x14’x8’)
Budget: $500
Select each drop down to see the details of this acoustic treatment setup.


〉Acoustic treatments
〉What this treats
〉What this doesn't treat
Budget: $1,200

〉Acoustic treatments
〉What this treats
〉What this doesn't treat
Budget: $2,200


〉Acoustic treatments
〉What this treats
〉What this doesn't treat
Budget: $4,500


〉Acoustic treatments
〉What this treats
〉What this doesn't treat
Budget: $5,500


〉Acoustic treatments
〉What this treats
〉What this doesn't treat
Treatment for a large home studio (12’x17’x9’)
Budget: $10,000
Select each drop down to see the details of this acoustic treatment setup.


〉Acoustic treatments
〉What this treats
〉What this doesn't treat
Woah, that’s a lot of acoustic panels!
Are you sure I need all of that?
Truthfully, only you can provide the answer to this question and it will always relate back to your goals for the space.
Rooms cause massive distortions to the frequency response and produce incredibly uneven decay times. We use acoustic treatments to balance the frequency response, smooth the decay times, and create a more accurate and reliable space for you to work in.
It is important to remember that at the end of the day, YOU will always be YOU. The room you work in doesn’t change the sounds you hear in your head that you spend hours chasing to perfect a song. It changes how long and hard you have to work to get there, how many trips to the car you have to take to finish the mix, and how creative you could be in the process.
Whether you’re in an untreated cube or in an incredible-sounding studio, your work will always be reflective of you. In a well-treated studio, you’ll be able to trust what you hear from your monitors, work faster and more confidently, take fewer trips to the car, and most importantly you’ll be more CREATIVE.